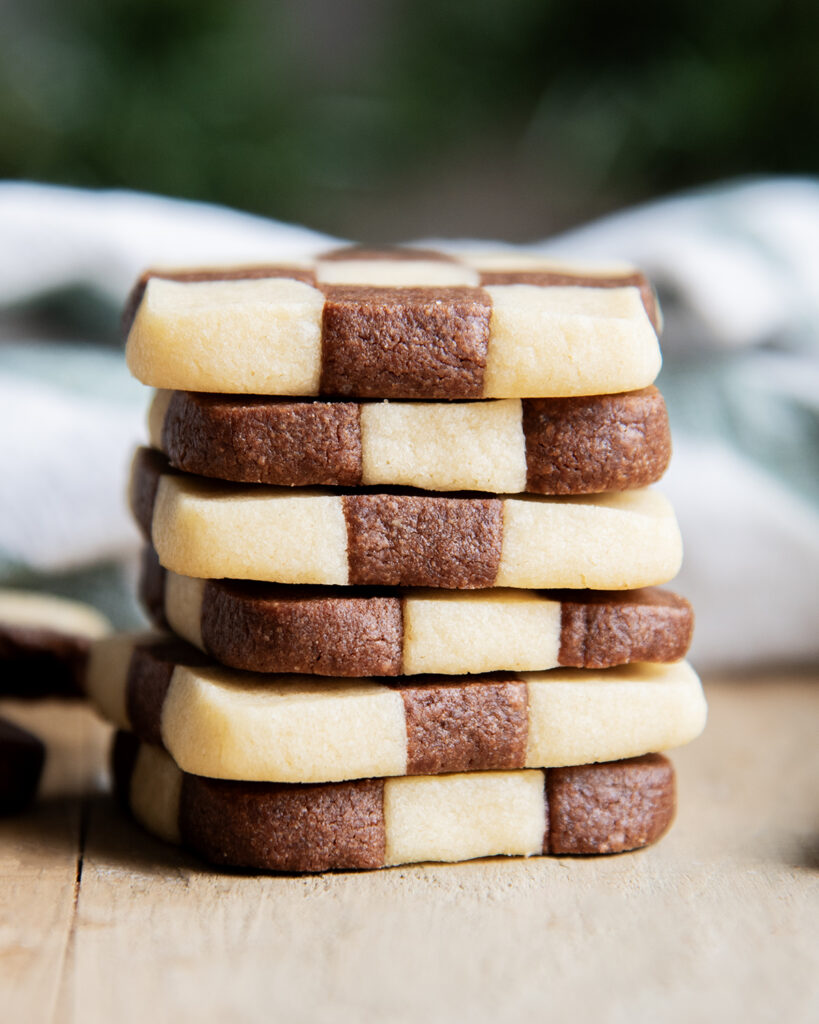
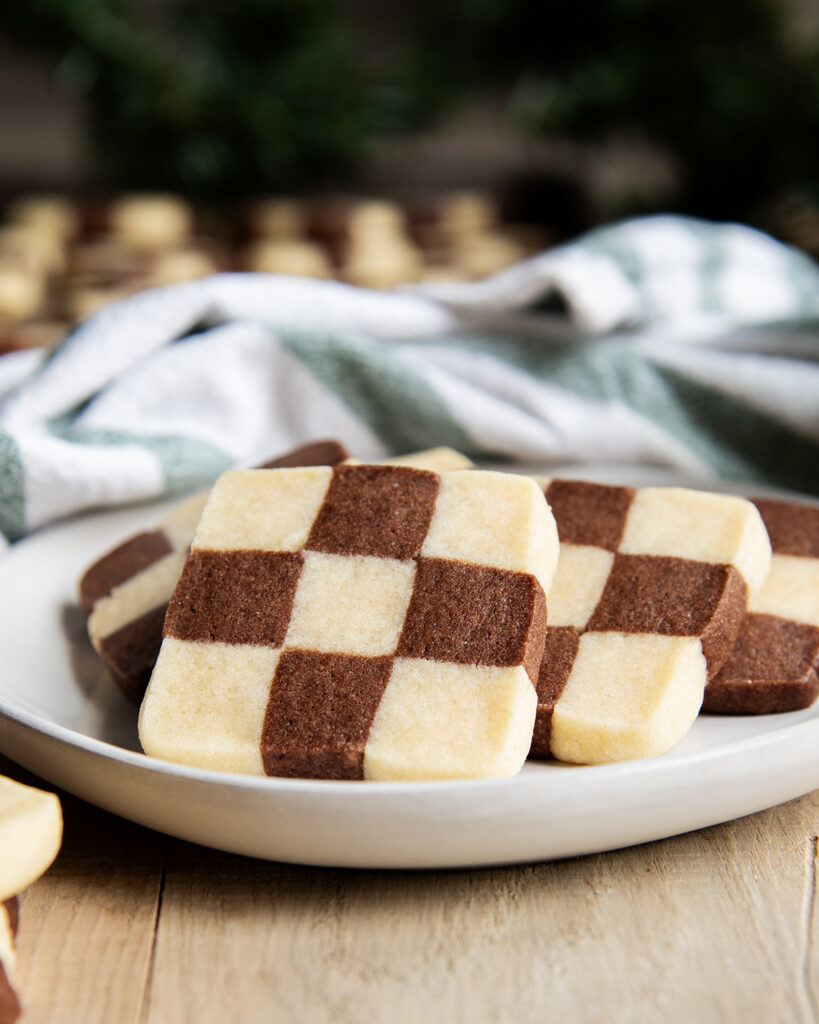
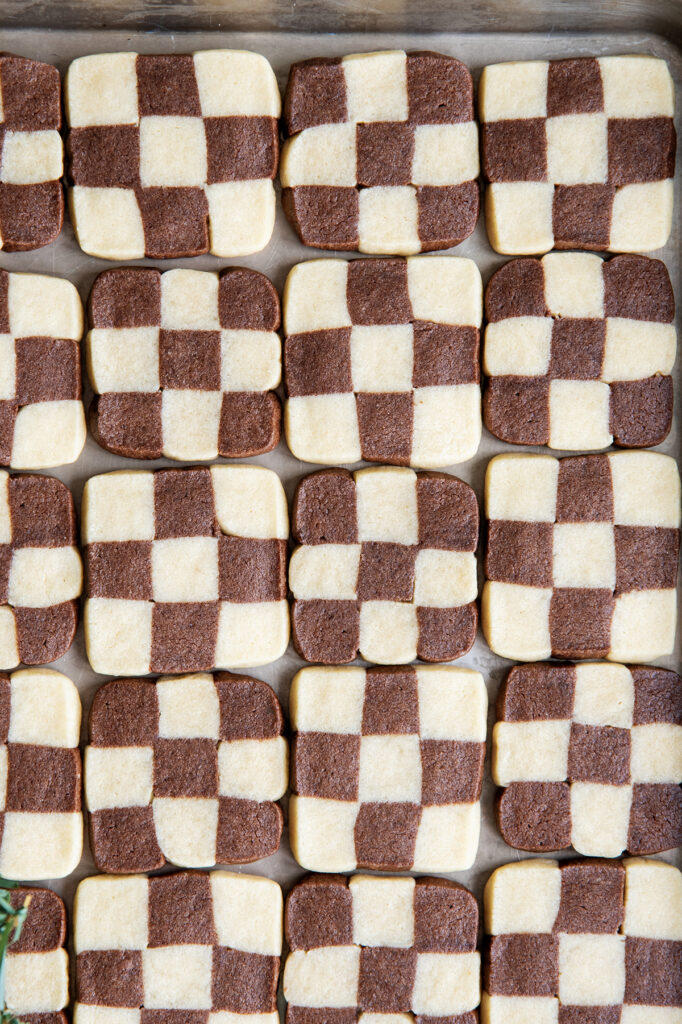
Checkerboard cookies are a stunning treat that not only tastes delicious, but also looks so impressive! With a buttery, and soft cookie featuring both a vanilla and a chocolate dough patterned into a checkerboard design. The cookies may look complicated, but with our easy steps and guide you’ll be making these pretty cookies in no time!
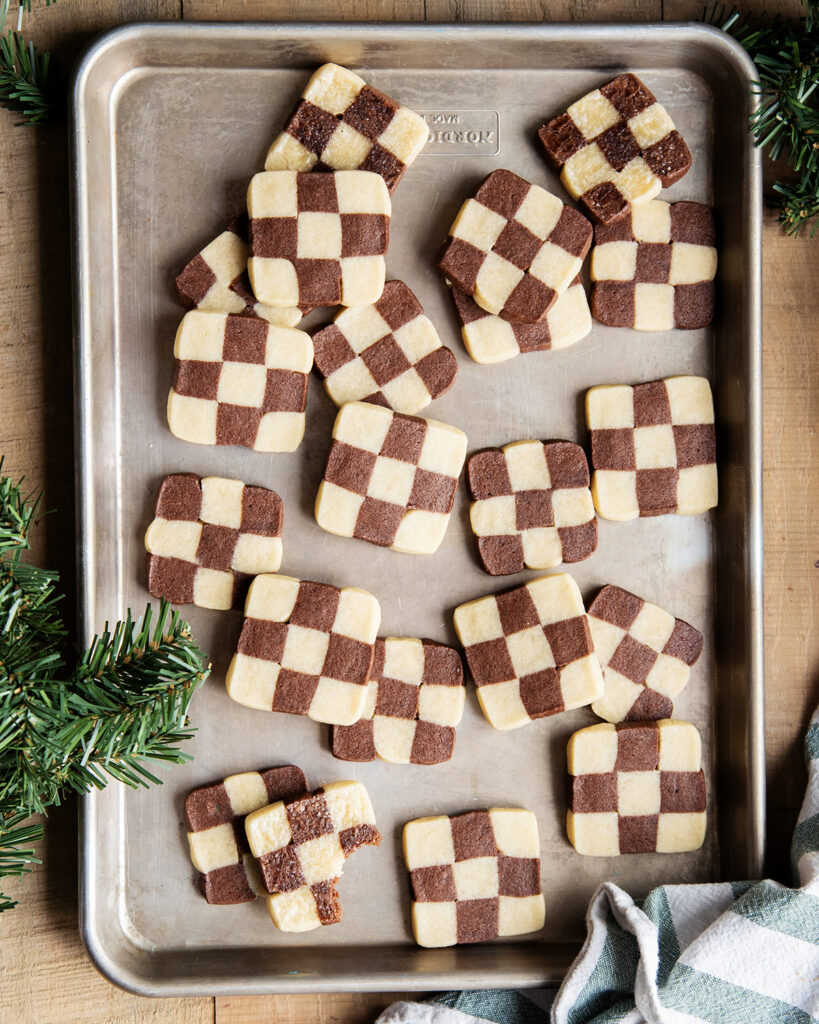
With a little patience, and a little time these Checkerboard Cookies can be the new favorite cookie in your kitchen. Perfect for holidays, especially cookie trays, or anytime you want to impress your friends and family!
I adapted my favorite Cut Out Sugar Cookies recipe to make two doughs, and turn it into these delicious Checkerboard cookies.
Why make this Recipe
- Visually Stunning: The chocolate and vanilla cookie patterned into a checkboard makes sure these cookies will stand out on any cookie tray!
- Soft or Crispy Texture: A deliciouy texture in each bite, the cookies have crispy edges, and a soft almost melt in your mouth center. You can bake them a little longer for a crunchy cookie.
- Amazing Flavor: They’re like a mix of shortbread and sugar cookies, and with the chocolate and vanilla cookie flavor together, these cookies are one of a kind and are sure to be a hit!
- Great for Gifting: I usually give a box of my favorite Ginger Molasses Cookies, plus a few other favorites for Christmas, but these will definitely be making the list too! They’re so pretty packaged up on a tray for the holidays!
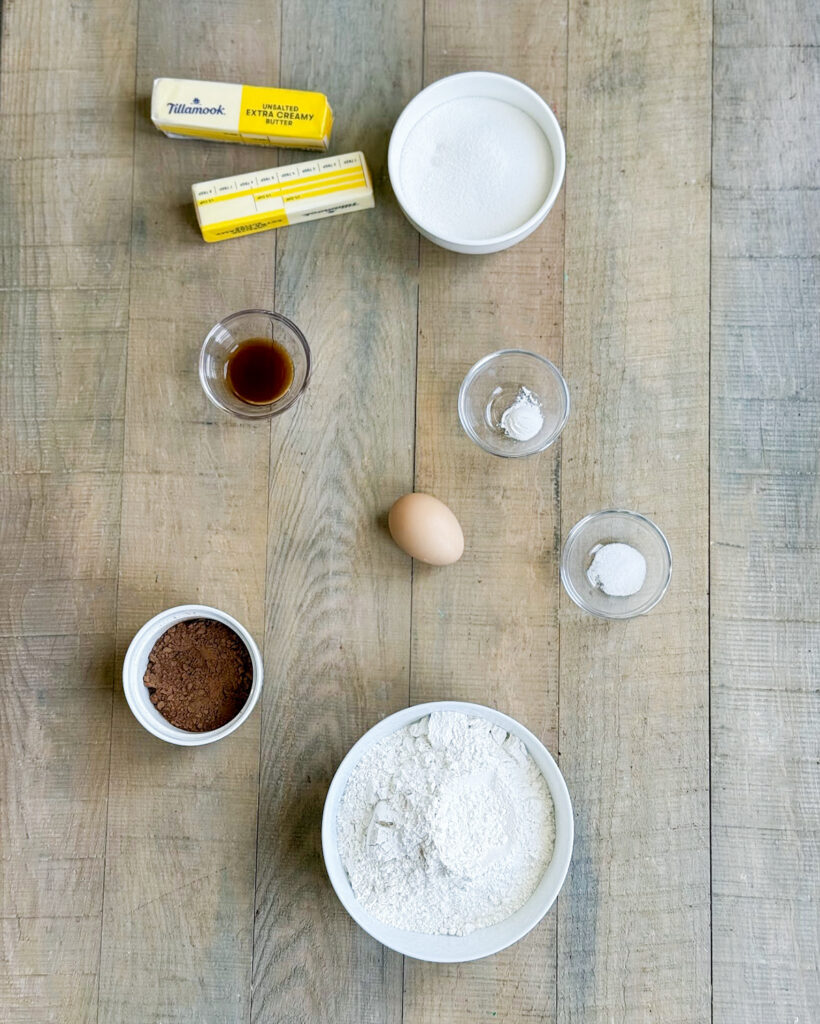
Ingredients Needed
This is a quick overview of the ingredients you’ll need for this Checkerboard Cookie Recipe. Specific measurements and full recipe instructions are in the printable recipe card below.
- Unsalted Butter – I always recommend salted butter for bakers, so you can control the amount of salt added.
- Granulated Sugar – Adds the right amount of sweetness to the cookies.
- Egg – Just one to help bind the cookie dough together.
- Vanilla Extract – Make sure to grab the real deal!
- All Purpose Flour – The base of the cookie dough
- Baking Powder – Just a little to give the cookies a better texture, but not too much so they’ll spread.
- Salt – We are adding a little salt to balance the flavors. We do this with unsalted butter because different brands have different amounts.
- Unsweetened Cocoa Powder – We’ll separate half the dough and mix this in to make the chocolate portion.
How to make Checker Board Cookies
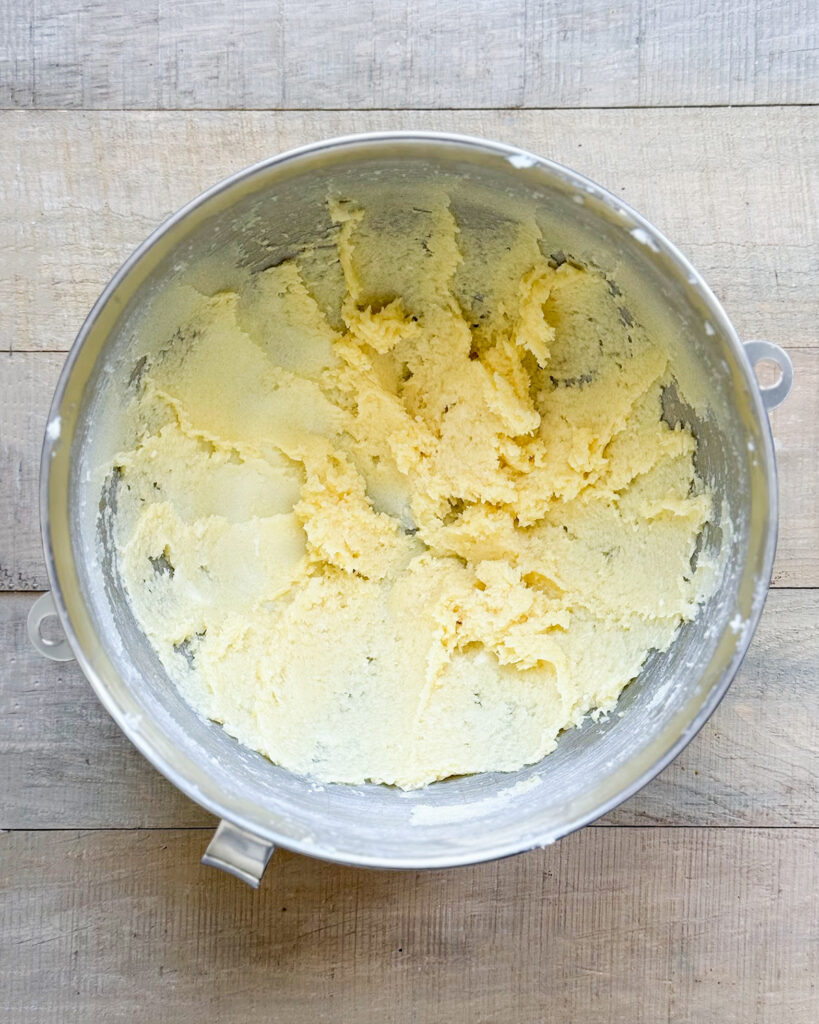
Step 1: Mix the Wet Ingredients. Cream together the butter and granulated sugar for a couple minutes, add in the egg and vanilla extract.

Step 2: Add in the Dry Ingredients. Slowly add in the flour, baking powder, and salt and mix until you have a nice soft dough.
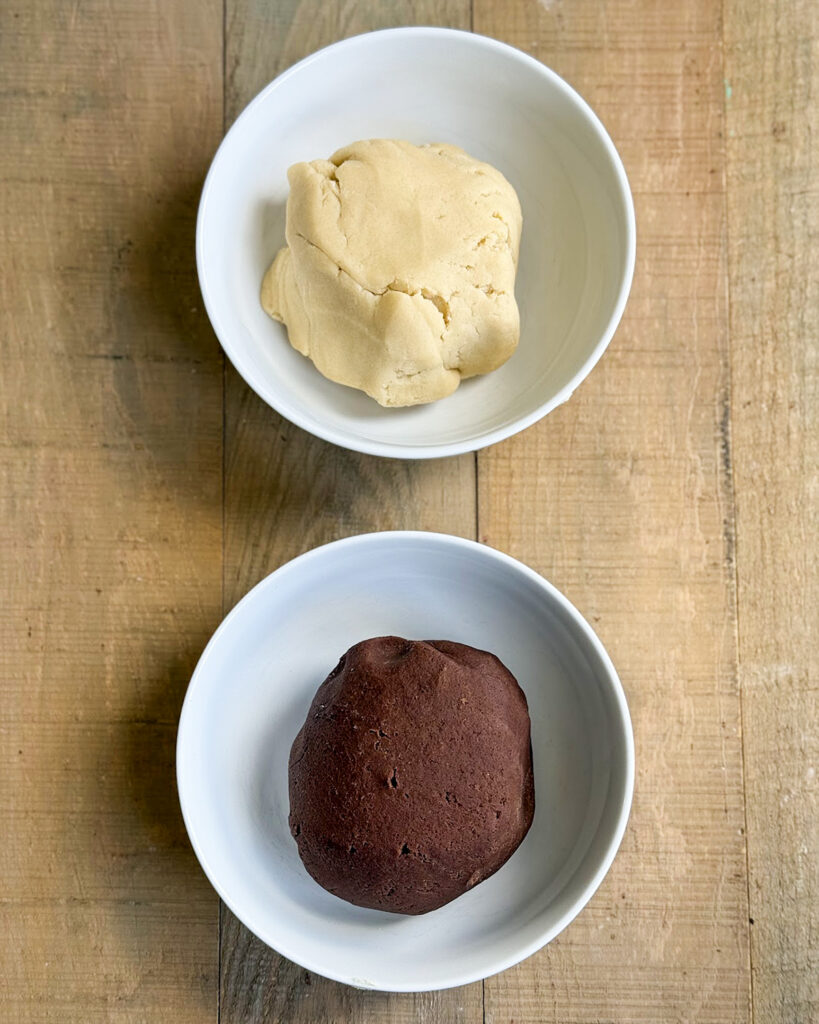
Step 3: Make the Separate Doughs. Divide the dough in half, removing half from the bowl. Add the cocoa powder to the mixing bowl and mix until it’s fully incorporated in the dough. Work the extra flour into the vanilla cookie dough.
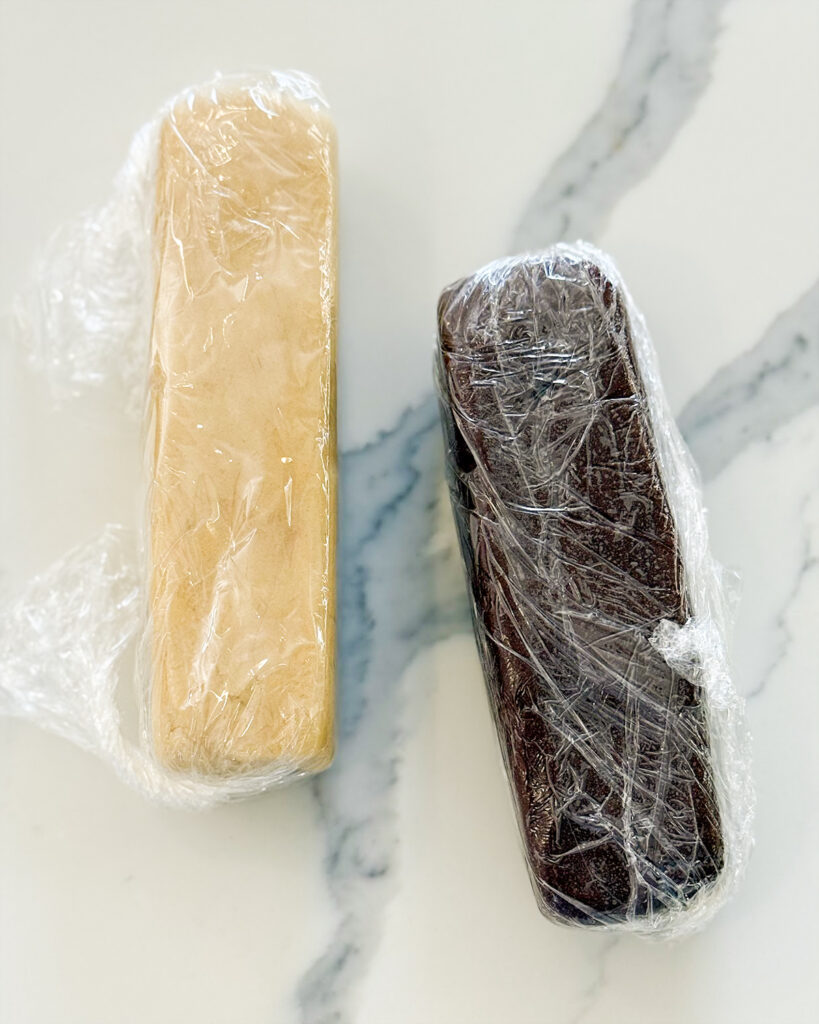
Step 4: Make the Cookie Dough Logs. Form each cookie dough into a log with squared edges. you want them each to be about 2 inches tall, 2 inches wide, and 6 inches long. Making sure they are the same size. Wrap each in plastic wrap and place them in the fridge to chill for about 1 hour. Not longer.
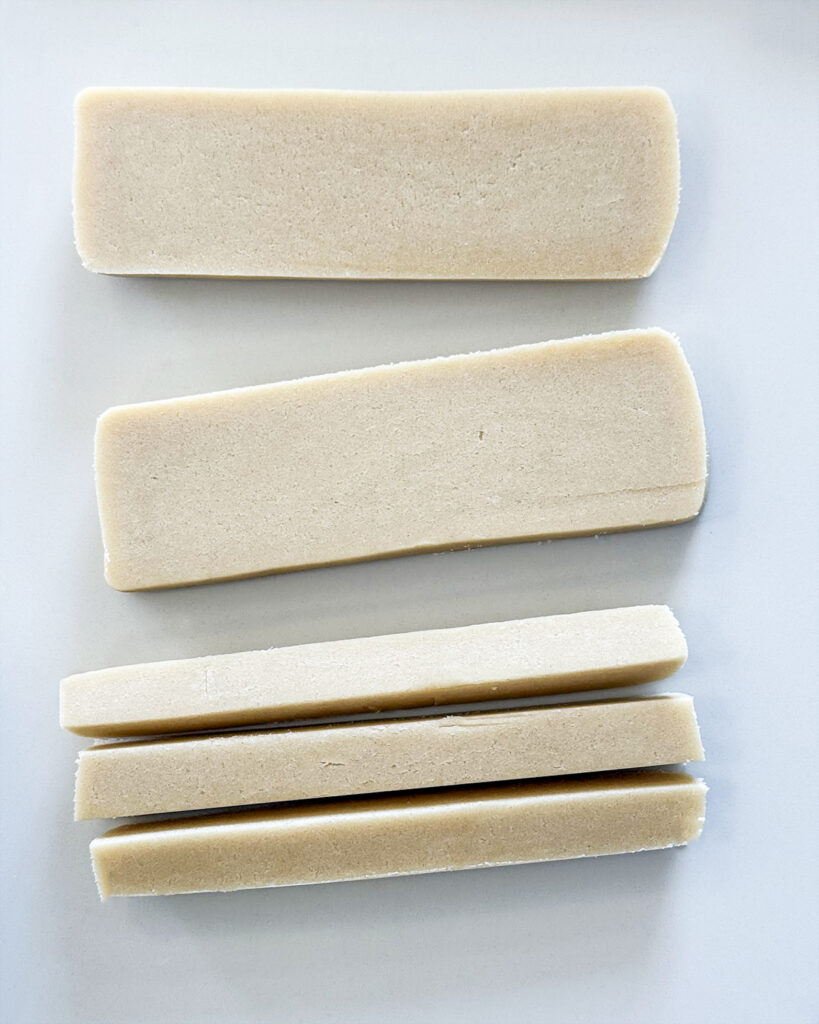
Step 5: Slice the Logs. Using a ruler and a sharp knife cut each block into three even strips. Then cut each strip into three more strips, so you end up with 9 slices of each cookie dough.
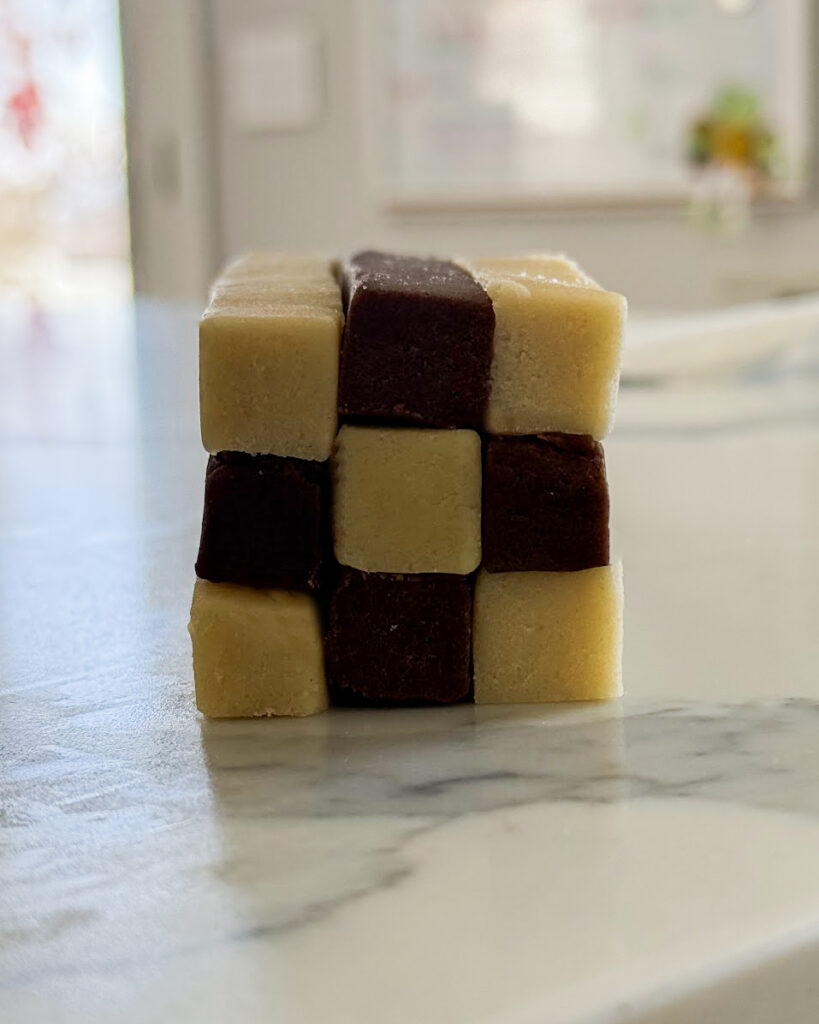
Step 6: Form the Checkerboard. Take 1 vanilla strip, then line a chocolate strip next to it, and another vanilla strip. Then on top of those alternate with first a chocolate, then vanilla, then chocolate. Then add a third row the same as the first. Repeat, making a second block with the opposite colors, first a chocolate strip, then vanilla, then chocolate, etc. Press the strips together to get rid of any possible gaps. Cover the logs again with plastic wrap and chill for at least another 1 hour.
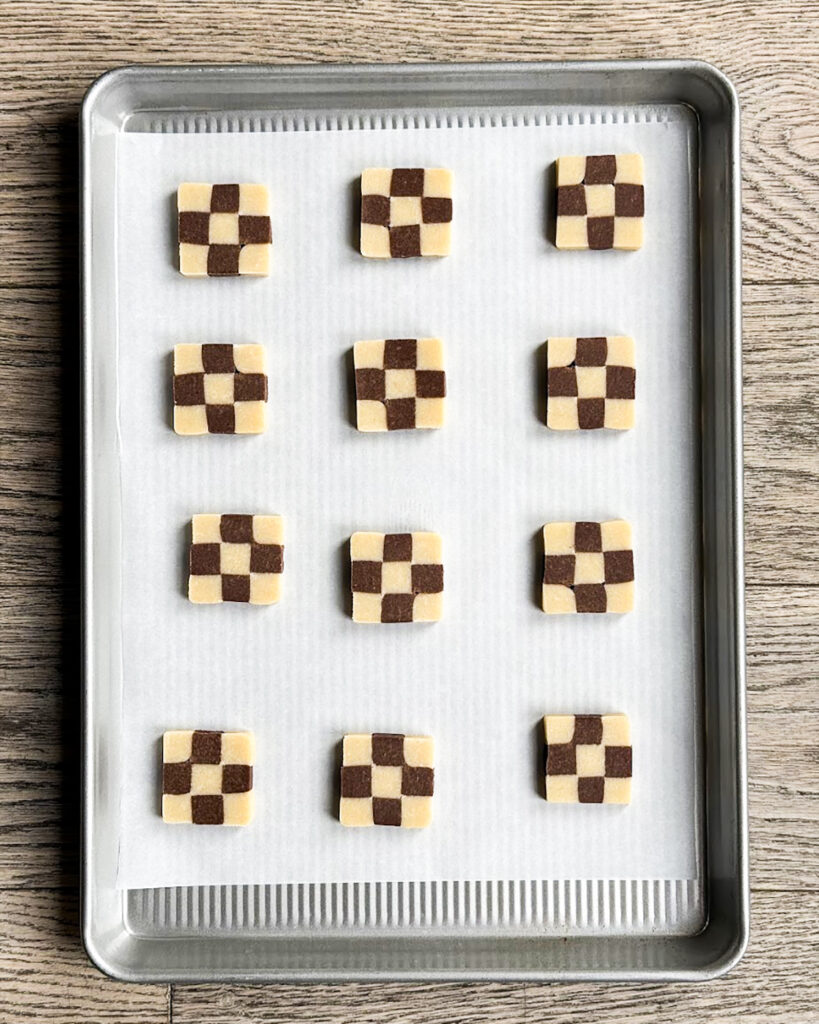
Step 7: Slice and Bake. Take one log and slice the dough into 3/8 inch pieces (between 1/4 inch and 1/2 inch thick). Trim the cookie edges as needed to make neat square cookies. Place the cookies about 2 inches apart on a lined baking sheet and bake until lightly goldened on the edges.
Tips and Tricks
- Customize your Flavors: Instead of a Chocolate Dough and a Vanilla Dough you could transform your vanilla dough with extracts or food coloring. Try a mint green dough with a little peppermint extract and green food coloring. Or try a little strawberry extract and pink food coloring. You name it!
- Trim off the Excess: After you have sliced your cookie strips, I like to trim off the excess to make sure the strips are straight. Cut off any rounded edges or corners. You can also cut off the excess after squishing together your cookie strips, or even after slicing the cookies. You can discard the scraps, or roll them together to make a fun marbled sugar cookie dough.
- Don’t Skip Chilling: This is a cookie dough that needs to be chilled. The cookies will spread too much, and be too soft to work with if you do not.
- Add a Sparkle: Brush the tops of the cookies with a simple egg wash (1 egg yolk + 1 TBS water) and then sprinkle the tops with coarse sugar for an extra crunch, and a sparkly look on the cookies.
Storage Instructions
The cookies can be stored in an airtight container at room temperature for up to 5 days. They can also be frozen for up to 3 months.

These Checkerboard Cookies are such a fun cookie with a beautiful presentation. They’re delicious, and will be a new favorite for any one you share them with!
More Cookie Favorites
- Lemon Poppy Seed Cookies
- Oatmeal Toffee Cookies
- Lemon Coconut Shortbread Cookies
- Puff Pastry Palmiers
- Chocolate Cherry Thumbprint Cookies
If you try these Checkerboard Cookies, please leave a 🌟 rating and let me know how it went in the comments below. I love hearing from you!

Checkerboard Cookies
Ingredients
For Making the Cookie Base:
- 1 cup unsalted butter
- 1 cup granulated sugar
- 1 large egg
- 2 tsp vanilla extract
- 2 1/2 cups all purpose flour
- 1/2 tsp baking powder
- 1/2 tsp salt
For Making the Two Doughs:
- 3 TBS unsweetened cocoa powder
- 2 TBS all purpose flour
Instructions
For Making the Cookie Base:
- Cream together the butter and sugar in a large bowl (the bowl of a stand mixer), or with a hand mixer until light and fluffy, about 2 minutes. 1 cup unsalted butter, 1 cup granulated sugar
- Add the egg and vanilla extract and mix until combined, scraping the edges and side of the bowl as needed. 1 large egg, 2 tsp vanilla extract
- Add in the flour, baking powder, and salt and mix until combined and you have a nice soft dough. 2 1/2 cups all purpose flour, 1/2 tsp baking powder, 1/2 tsp salt
For Making the Two Doughs:
- Divide the dough in half, into two equal portions.
- Make the chocolate dough by placing half the dough back into the mixing bowl and adding in the unsweetened cocoa powder, mixing it into the dough until combined. Set the dough aside. 3 TBS unsweetened cocoa powder
- Add the extra flour to the vanilla base and work it into the dough until combined completely. 2 TBS all purpose flour
- Form each of the doughs into separate rectangular blocks that are about 2×2 inch square by 6 inches long.
- Wrap them each with plastic wrap and place them in the fridge for 1 hour.
- Using a sharp knife, carefully cut each block into 3 even strips. Then cut each strip into thirds again to give you 9 thin strips of each dough block.
- Trim off any rounded edges to try and keep the checkerboard pattern neat.
- Take one vanilla strip, then a chocolate strip, then another vanilla strip and press those together. Then on top of those alternate, chocolate, then vanilla, then chocolate. Then a third row the same as the first.
- Press the strips together to remove any possible gaps, and smooth out the cookie dough into smooth lines.
- Repeat making a second block with the opposite colors, starting with chocolate.
- Cover the logs with plastic wrap and chill for at least another hour.
- Preheat the oven to 350 degrees Fahrenheit, and line a baking sheet with parchment paper.
- Take one log at a time and slice the dough into 3/8 inch thick pieces. Tim the cookie edges if desired, or needed to make neat square cookies. Place the cookies onto the prepared baking sheet 2 inches apart.
- For a soft cookie, bake the cookies for about 8 to 10 minutes, or until the tops are set and the edges are lightly golden. For a crunchier cookie bake about 2 to 3 minutes longer.
- Let the cookies cool for about 5 minutes on the baking pan, then transfer to a wire rack to cool completely.
- Bake additional cookies as needed.
Notes
- Customize your Flavors: Instead of a Chocolate Dough and a Vanilla Dough you could transform your vanilla dough with extracts or food coloring. Try a mint green dough with a little peppermint extract and green food coloring. Or try a little strawberry extract and pink food coloring. You name it!
- Trim off the Excess: After you have sliced your cookie strips, I like to trim off the excess to make sure the strips are straight. Cut off any rounded edges or corners. You can also cut off the excess after squishing together your cookie strips, or even after slicing the cookies. You can discard the scraps, or roll them together to make a fun marbled sugar cookie dough.
- Don’t Skip Chilling: This is a cookie dough that needs to be chilled. The cookies will spread too much, and be too soft to work with if you do not.
- Add a Sparkle: Brush the tops of the cookies with a simple egg wash (1 egg + 1 TBS water) and then sprinkle the tops with coarse sugar for an extra crunch, and a sparkly look on the cookies.
- Storage Instructions: The cookies can be stored in an airtight container at room temperature for up to 5 days. They can also be frozen for up to 3 months.

Leave a Reply