These Candy Trains are a fun edible craft that turn out so cute, and they’re so easy to make. Perfect for adults and kids, the little trains are great for a table place setting, stocking stuffer, or classroom treat. They’re cute, customizable, and so fun to make and eat!
Making a DIY Candy Train is such a fun mix of holiday candies, that come together in a cute decor item that is also edible. With easy steps, and different variation ideas, my candy trains are festive, cute, and so fun to build with your kiddos.
Last year my son wanted to make and sell these for a class market he had in 2nd grade and he and his class mates loved them. He sold them all for $8 classroom dollars each and was sold out in no time. We had so much fun making them too!
Why You’ll Love these Candy Trains
- Kid Friendly – These are a great edible craft for holiday parties, or a rainy afternoon. Use a low temperature glue gun, and keep an eye on the kids as they make these to avoid any burn injuries.
- Great for Gifting – Wrap these cuties up in cellophane or a plastic bag tied with ribbon for a cute gift. My kids love giving them out to their friends!
Ingredients Needed
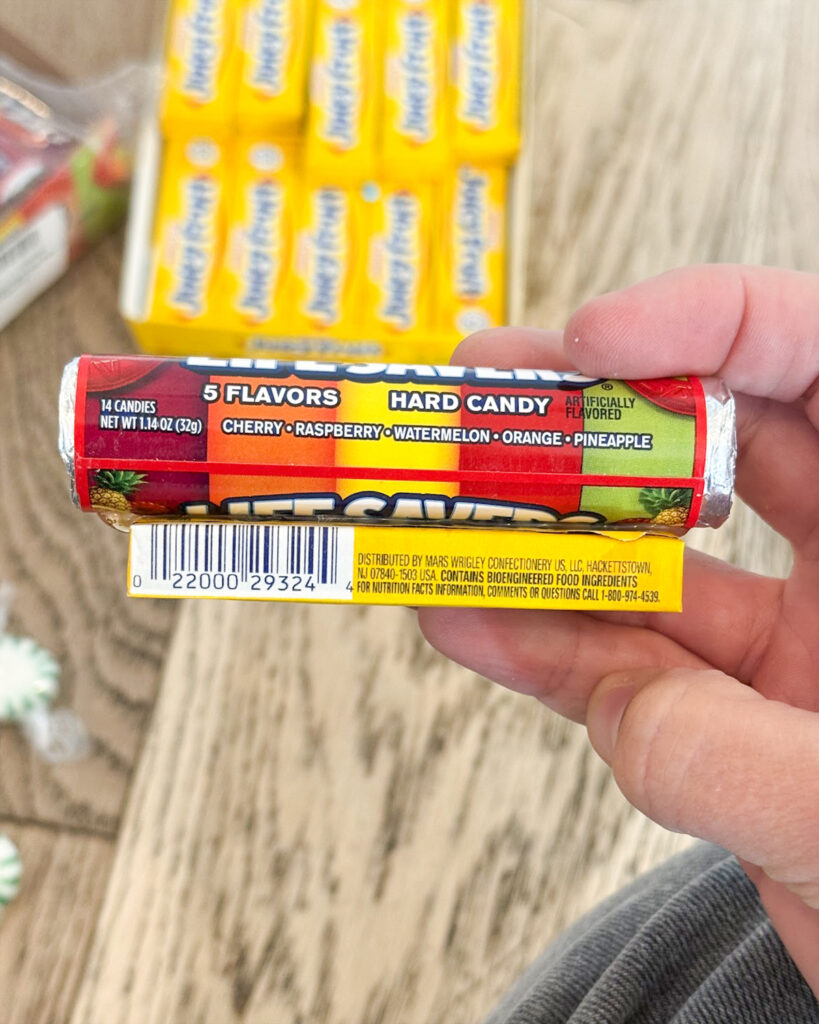
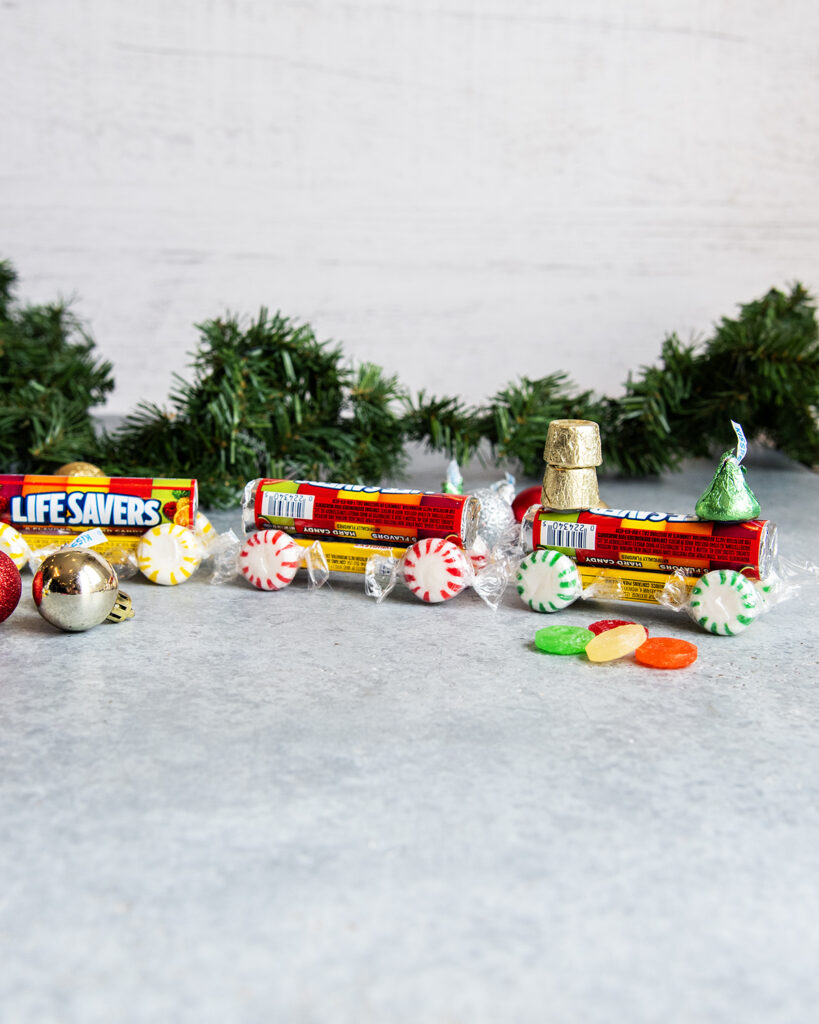
- Life Saver Rolls – Use these for the body of the train, or use a roll of Rolos.
- 5 Stick Gum Packs – It can be harder to find the 5 stick packs, but I ordered some on Amazon.
- Starlight Mints – Grab the peppermints in the holiday season, or you can get the Starlight Assorted Fruit Mix. We use these for the Wheels. Reese’s Cups Miniatures would work great too!
- Rolos –
- Hershey Kisses – For the Smoke Stack
How to make a Candy Train?
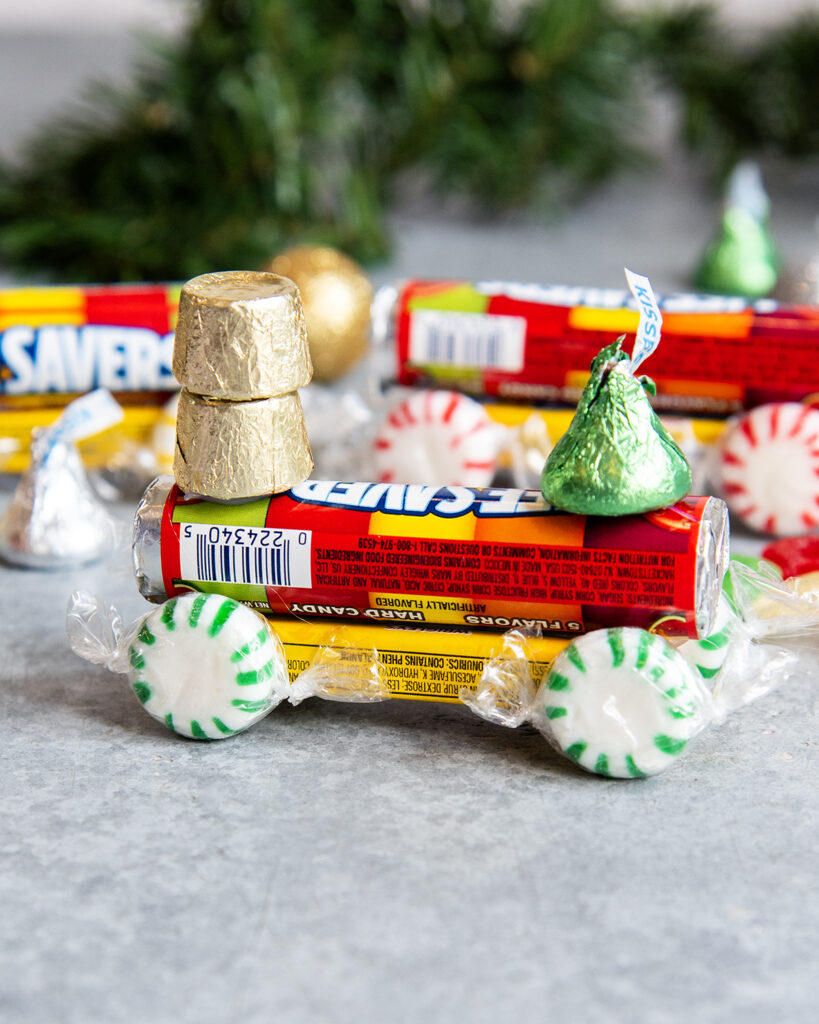
Step 1: Glue the Gum onto the Life Savers.

Step 2: Glue the Rolos onto the Train. Glue one Rolo on one end of the top of the life saver roll, then another on top of it.
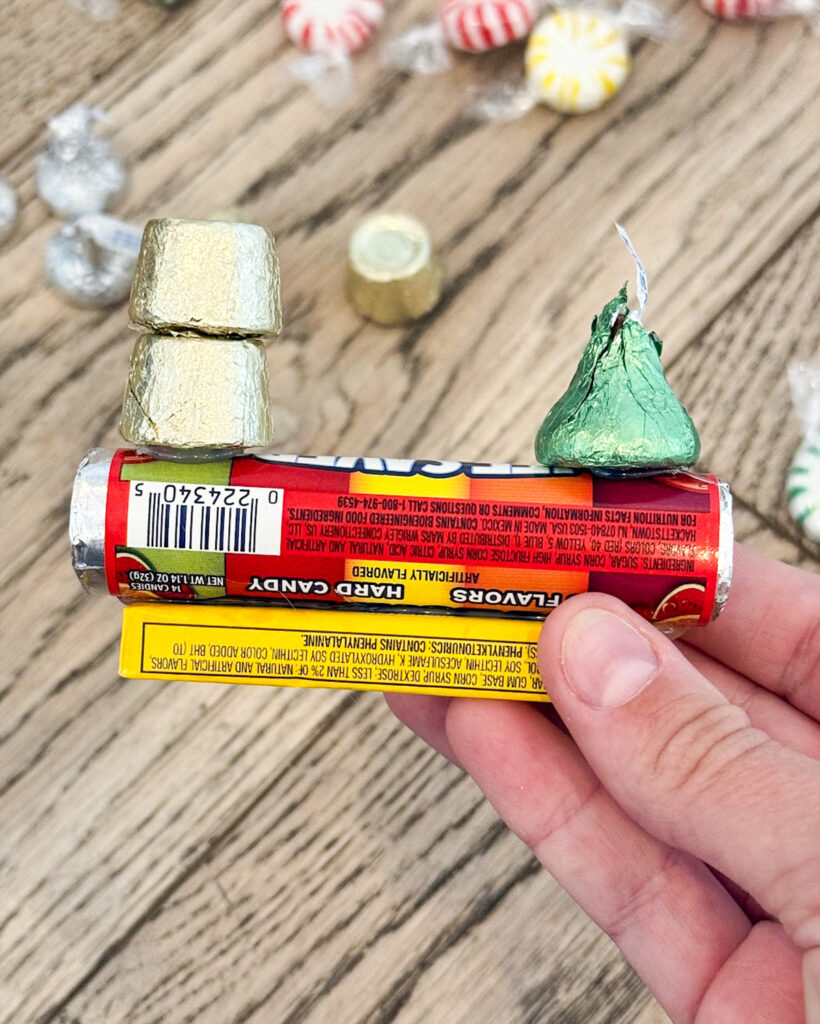
Step 3: Glue a Hershey Kiss onto the other end of the Train.
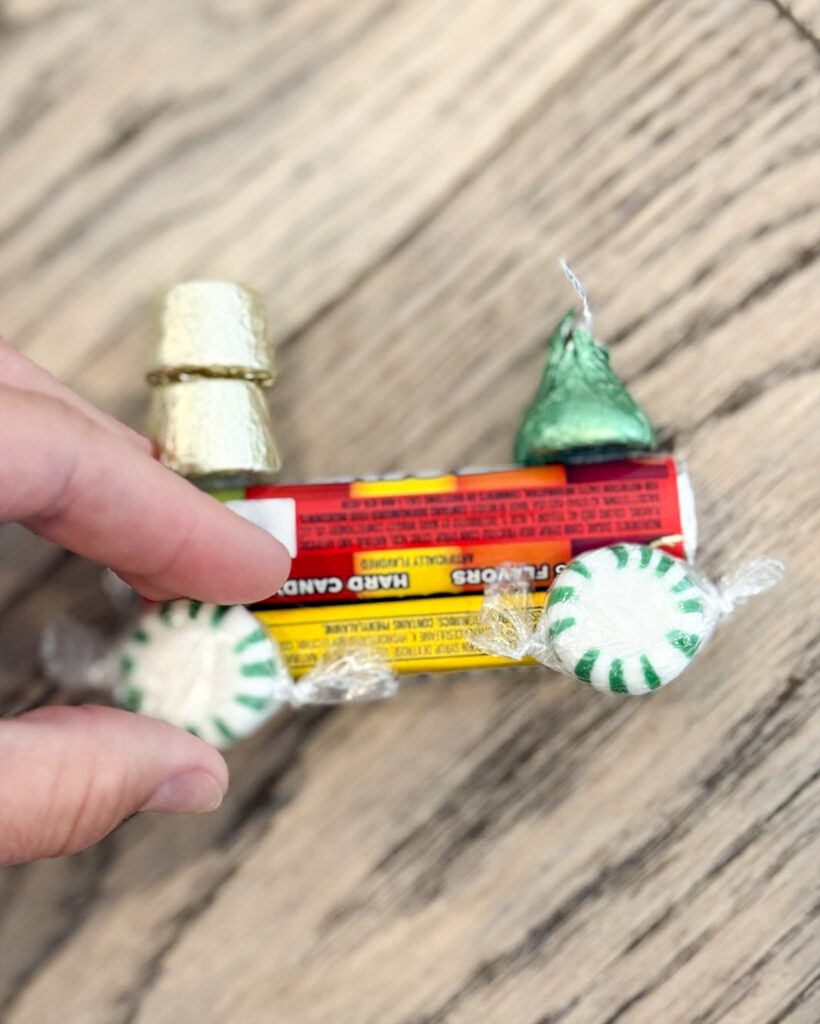
Step 4: Glue on the Wheels. Glue onto one side of each of the 4 starlight mints sticking them onto the corners of the gum a little below the gum to make the wheels.
Tips and Tricks
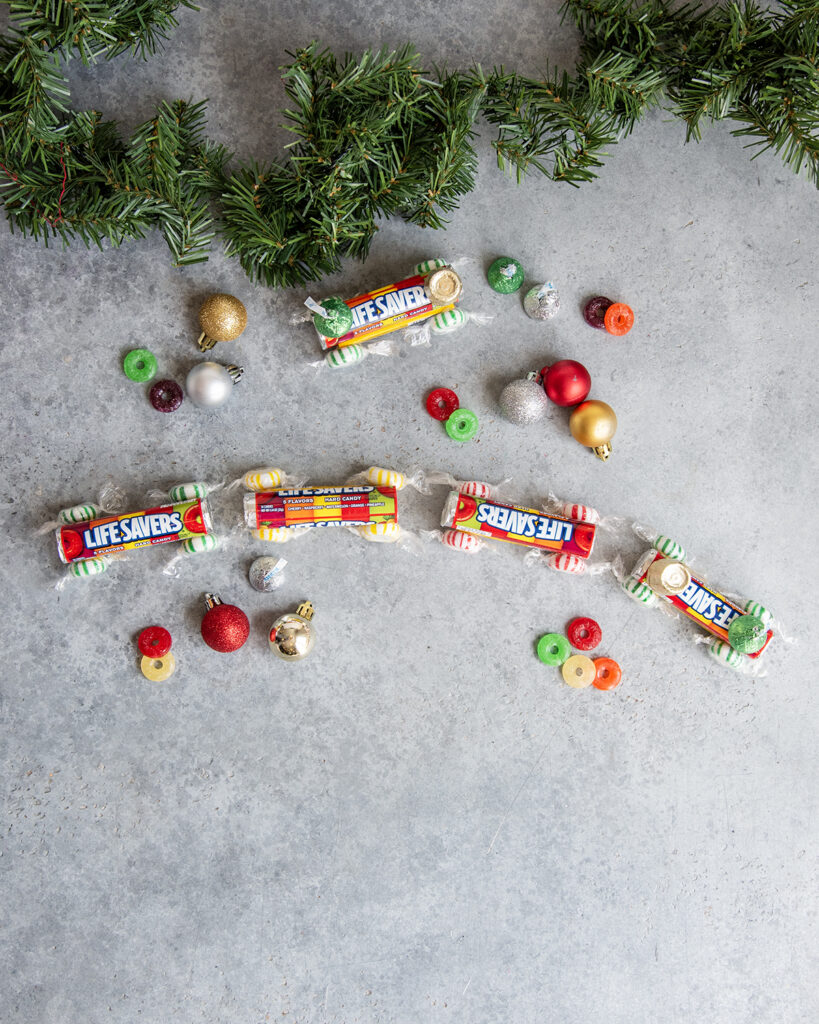
- Add name Tags – Add little flags or gift tags to personalize the trains to those your gifting them too. Hot glue a loop of ribbon between the Rolos and Hershey Kisses.
- Kid Friendly – Use Large glue dots instead of a glue gun to make this even easier and safe for kids.
Storage Instructions
These will stay good as long as the candies you use in them. Most candies are good for 6-12 months if kept in a cool and dry place. Don’t let the trains sit out in the sun or a warm spot or your chocolate might melt.

These Christmas Candy Trains are fun and festive. Such a cute treat to make, display and eat!
More Edible Christmas Gifts
- DIY Brownie Mix in a Jar
- Hard Tack Candy Recipe
- Homemade Vanilla Extract
- White Hot Chocolate Bombs
- Hot Chocolate Spoons
- Reindeer Hot Chocolate Cones

Candy Trains
Ingredients
- 1 Lifesaver Roll
- 1 Pack of Gum
- 2 Rolos
- 1 Hershey Kiss
- 4 Starlight Mints
- Hot Glue
Instructions
- Add a line of glue onto the bottom of a pack of gum and attack it to a Lifesaver Roll. 1 Lifesaver Roll, 1 Pack of Gum, Hot Glue
- Glue one Hershey Kiss and two Rolos on top of the Life Saver Roll. 2 Rolos, 1 Hershey Kiss
- Glue two Mints onto the each side of the gum to make wheels. 4 Starlight Mints
- Let the glue dry and your candy trains are now ready to giveaway!
Notes
- Add name Tags – Add little flags or gift tags to personalize the trains to those your gifting them too. Hot glue a loop of ribbon between the Rolos and Hershey Kisses.
- Kid Friendly – Use Large glue dots instead of a glue gun to make this even easier and safe for kids.

Leave a Reply